Wednesday 30 March 2016

STRETCHING EXERCISES FOR UPPER BODY


MUSCLES OF BACK

Neck
1. Side Bends
Sit or stand with hands loosely at your sides. Tilt your head sideways. Hold for 5seconds.Switch to other side.
Repeat this for 2-3times.
2.Neck Flexion/Extension

Gently tilt your head forward and backward and feel the stretch. Repeat 2-3times.
Chest
1.  Pectoralis  major stretch
Place both arms directly behind you against a flat surface with arms parallel to floor. Pull against flat surface until stretch is felt in chest. Repeat 2-3 times.
Abdominals
1.Lying abdominal stretch
Lie on front side and push upper torso upwards with arm until feel stretch. Repeat this for 2-3times.
Lower back
1.Mid back stretch
With hands on the small of the back, slightly until stretch is felt. Repeat this for 2-3 times.
Upper back
1.Latissmus dorsi stretch
Begin by kneeling and extending forward until stretch is felt. Slide hands forward and push buttocks backward. Repeat this for 2-3 times.

Shoulder
1.Cross chest stretch
Pull your left arm across your chest and push on your elbow close to your chest with your right hand. Repeat this for both hands for 2-3times.
Behind the back stretch
1.Stand up and place your left hand on the small of the back. Grab your left hand and pull towards the right side.Repeat on both sides for 2-3 times.

Tuesday 29 March 2016

STRETCHING EXERCISES FOR HIP N GLUTEAL MUSCLES

HIP AND GLUTEAL MUSCLES


There are 4 groups of muscles around the hips: adductors (on the inside),
abductors (on the lateral hip), flexors (on the anterior side) and extensors (on the posterior side). These
muscles and the gluteal muscles control the movements of the hips.


Hip Adductors (Inner Thigh)


Gently push knees to floor until stretch is felt. Keep back straight. Repeat it for 2-3times.

Hip Abductors

Cross your right leg over your left leg. Lookover your right shoulder while turning your trunk and pushing back on knee with left elbow. Repeat with both sides 2-3 times.

Hip Flexors/Extensors

 Slowly lean and push hip to floor until stretch is felt on front side of thigh .Repeat this for both legs for 2-3times

Gluteal Muscles

Place right foot above left knee. Slowly lift left leg toward chest. Keep your arm flat on floor . Repeat this 2-3times for both legs.

Monday 28 March 2016

STRETCHING EXERCISES FOR LOWER BODY

        STRETCHING EXERCISES FOR LOWER BODY.

Remember to:
 Warm-up your muscles first before
stretching (e.g. stretch after
walking).
 Stretch until you feel mild discomfort,
not pain.
 Never bounce or force a stretch.
 Hold the stretch for 10-30 seconds
and then relax.
 Do not hold your breath when
stretching.
 Do stretching exercises at least
2-3 times a week.

QUADRICEPS
Lying Quadriceps Stretch
Lie on your side. Pull heel toward buttocks Pull heel toward buttocks until a stretch is felt in
until a stretch is felt in front of the thigh. Repeat with both legs 2-3 times.

Standing Quadriceps Stretch
Pull heel toward buttocks until a stretch is felt in front of the thigh. Keep leg close to body with knee pointing to floor. Repeat with both legs 2-3 times.

HAMSTRINGS

Lying Hamstring Stretch
Slowly bring knee towards chest. Gently extend Bend knee of left leg and hold when in a comfortable stretch. Repeat the stretch for 2-3times.

Sitting Hamstring Stretch
Bend knee of left leg and keep right leg extended with knee slightly bent. Bend at the waist towards your left foot. Hold your lower leg for support. Repeat with both legs.
Standing Hamstring Stretch

Left leg in front of you. Bend right knee. Lean forward placing hands on bent leg. Keep back straight and hold. Repeat with both legs 2-3 times.

Don’t
1) excessive strain to lower back, 2) common for people to bounce, which is not advised, 3) no benefit- contracts hamstring rather than lengthens it.


Calf Muscles
Gastrocnemius (Upper calf)
Hands against the wall. Keep back leg straight. Push heels down and slowly lean forward until stretch is felt in the back of the calf. Repeat this for both legs for 2-3times.

Soleus (Lower calf)
Same stretch as gastrocnemius, but bend knees of both legs .repeat this for 2-3times.

Friday 25 March 2016

Lower back pain treatment and cause

DESCRIPTION: 

Eighty percent of adults will experience significant low back pain sometime during their lifetime.
Low back pain usually involves muscle spasm of the supportive muscles along the spine. Also, pain, numbness and
tingling in the buttocks or lower extremity can be related to the back. There are multiple causes of low back pain (see
below). Prevention of low back pain is extremely important, as symptoms can recur on more than one occasion.


COMMON CAUSES:
1)Muscle strain. The muscles of the low back provide the strength and mobility for all activities of daily living.
Strains occur when a muscle is overworked or weak.
2)Ligament sprain. Ligaments connect the spinal vertebrae and provide stability for the low back. They can be
injured with a sudden, forceful movement or prolonged stress.
Poor posture. Poor postural alignment (such as slouching in
front of the TV or sitting hunched over a desk) creates
muscular fatigue, joint compression, and stresses the
discs that cushion your vertebrae. Years of abuse can cause
muscular imbalances such as tightness and weakness, which
also cause pain.
3)Age “Wear and tear” and inherited factors may cause
degenerative changes in the discs (called degenerative disc
disease), and joint degeneration of the facet joints of the spine
(called degenerative joint disease). Normal aging causes
decreased bone density, strength and elasticity of muscles and
ligaments. These effects can be minimized by regular exercise,
proper lifting and moving techniques, proper nutrition and
body composition, and avoidance of smoking.
Disc bulge. or herniation, can cause pressure on a nerve, which can radiate pain down the leg. This generally
responds well to a strengthening and stretching program and rarely requires surgery.
Other causes of low back pain include bladder/kidney infection, endometriosis, cancer, or ovarian problems.


TREATMENT:
REST: Rest from aggravating activity. Avoid prolonged sitting, driving, bending, heavy lifting and twisting.
ICE: Ice applied to the low back for 15 minutes every 1 – 2 hours is helpful in reducing pain and spasm.
Avoid using heat for the first 48 hours of an acute injury.
NSAIDs: Your doctor may prescribe anti-inflammatory medication such as aspirin, advil, aleve, ibuprofen or
naproxen sodium.
EARLY EXERCISE: Gentle exercise for mobility and stretching (especially the muscles of the legs and back)
can help decrease the severity, duration and recurrence of low back pain. Try the suggested exercises on the
back of this sheet. Do not perform exercises that increase your pain.
POSITIONING: Modifying your sleeping position can help ease strain to your low back. Make sure your
bed is firm enough to give you adequate support, and use a small pillow for you head. If you sleep on your
back, try putting a pillow under your knees. Or if you prefer to sleep side lying, put a pillow between your
thighs and if you are side bent, a folded towel under your waistline. 


PREVENTION:
Once the severity of pain has decreased, a rehabilitation program to strengthen your hip, abdominal and back
muscles can help prevent recurrences.
Posture! Posture! Posture! The goal is neutral spine, not slumped or over-arched.
Proper lifting and body mechanics.
See your health care provider if you have the following: significant pain that persists beyond a week, unexplained fever,
unexplained weight loss, redness or swelling on the back or spine, pain /numbness /tingling that travels down the
leg(s) below the knee, leg weakness, bowel or bladder problems, or back pain due to a severe blow or fall.
If your symptoms do not resolve within 2-4 weeks please contact your clinician.


BASIC EXERCISES FOR THE LOW BACK 

Perform these exercises slowly, without forcing movement. Be sure to breathe throughout the exercises. You should
feel a slight stretch, however, do not move into pain. Your symptoms should not intensify as a result of doing your
exercises. Perform the exercises 2-3 times daily. 

Hamstrings (fig.1)

Lying on floor, pull thigh towards your chest to about 90 .
Straighten your knee until a stretch is felt in back of thigh.
Hold 1 minute. Repeat with opposite leg.

Single Knee to Chest (fig.2)

Pull knee in to chest until a comfortable stretch is felt in hip
and lower back. Hold 15 seconds. Repeat with opposite leg.
Repeat 5-10 times each leg. 


Pelvic Tilt (fig.3)

Flatten back by tightening stomach and buttock muscles.
Hold 10 seconds. Repeat 10 times. 


Cat and Camel (fig.4)

On all fours, assume a “hump” back position by arching the
back up. Hold briefly and then slowly lower the back into a
sagging position. Repeat 10-15 times. 


Hip Flexors(fig.5)

Lying on you back, pull one knee to the chest to keep the
back flat. Allow the opposite thigh to drop over the edge of
the bed. Do not allow the thigh to move away from the
midline or rotate. Hold 30 seconds. Repeat 2 times each leg. 


Prop Up on Elbows (fig.6)


On firm surface, lying on your stomach, prop up on your
elbows. Keep pelvis, hips and legs relaxed. If propping on
elbows is painful, try only lying on stomach or with a pillow
under your abdomen. Hold 30 seconds. Repeat 3-5 times. 


Tail Wag (fig.7)

On all fours with back maintained in neutral position, gently
move hips toward rib cage to side bend trunk. Hold briefly,
then alternate and do other side. Repeat 10-15 times. 

Lumbar Rotation (fig.8)

Slowly rock knees from side to side in a pain free range of
motion. Allow back to rotate slightly. Repeat 10-15 times.

Thursday 24 March 2016

The vertebral column

The vertebral column

The spinal, or vertebral, column is made up of thirty-three vertebrae, of
which twenty-four are discrete vertebrae and nine are fused in the sacrum
and coccyx.
In the embryo the spine is curved into a gentle C shape but, with the
extension of the head and lower limbs that occurs when the child first holds
up its head, then sits and then stands, secondary forward curvatures
appear in the cervical and lumbar region, which produce the sinusoidal
curves of the fully developed spinal column.
The basic vertebral pattern is that of a body and of a neural arch
surrounding the vertebral canal.
The neural arch is made up of a pedicle on either side, each supporting a
lamina which meets its opposite posteriorly in the midline. The pedicle
bears a notch above and below which, with its neighbour, forms theintervertebral foramen. The arch bears a posterior spine, lateral transverse
processes and upper and lower articular facets.
The intervertebral foramina transmit the segmental spinal nerves as
follows: C1–7 pass over the superior aspect of their corresponding cervical
vertebrae, C8 passes through the foramen between C7 and T1, and all sub-
sequent nerves pass between the vertebra of their own number and the one
below.
Now to consider the individual vertebrae in turn.

The cervical vertebrae (7)

These are readily identified by the foramen transversarium perforating the
transverse processes. This foramen transmits the vertebral artery, the vein,
and sympathetic nerve fibres. The spines are small and bifid (except C1
and C7 which are single) and the articular facets are relatively horizontal.

The atlas (C1) has no body. Its upper surface bears a superior
articular facet on a thick lateral mass on each side which articulates with the
occipital condyles of the skull.
Just posteriorly to this facet, the upper aspect of the posterior arch of the
atlas is grooved by the vertebral artery as it passes medially and upwards to
enter the foramen magnum.
The axis (C2)  bears the dens (odontoid process) on the superior
aspect of its body, representing the detached centrum of C1.
Nodding and lateral flexion movements occur at the atlanto-occipital
joint, whereas rotation of the skull occurs at the atlanto-axial joint around
the dens, which acts as a pivot.
C7 is the vertebra prominens, so called because of its relatively long and
easily felt non-bifid spine; it is the first clearly palpable spine on running
one’s fingers downwards along the vertebral crests, although the spine of
T1 immediately below it is, in fact, the most prominent one.
The vertebral artery enters its vertebral course nearly always at the
foramen transversarium of C6; it is not surprising, therefore, that the
foramen of C7, which transmits only the vein, is small or even sometimes
absent.
The thoracic vertebrae (12)

These vertebrae are characterized by demifacets on the sides of their bodies
for articulation with the heads of the ribs and by facets on their transverse
processes (apart from those of the lower two or three vertebrae) for the rib
tubercles. The spines are long and downward sloping and the articular
facets are also relatively vertical. The lowest couple are rather ‘lumbar’ in
appearance, have a single facet on the side of the body and no facet on the
transverse process.
The bodies of T5 and T8 are worth noting; they come into relationship
with the descending aorta and are a little flattened by it on their left flank. If
the descending aorta becomes aneurysmally dilated, these four vertebral
bodies become eroded by its pressure, although their avascular interverte-
bral discs remain intact. You can make this diagnosis confidently when
shown a specimen of four partly worn-away vertebrae with normal inter-
vening discs.
The lumbar vertebrae (5)

These are of great size with strong, square, horizontal spines and with
articular facets which lie in the sagittal plane.
L5 is distinguished by its massive transverse process which connects
with the whole lateral aspect of its pedicle and encroaches on its body; the
transverse processes of the other lumbar

vertebrae attach solely to the junc-
tion of pedicle with lamina.
The sacrum (5 fused)
The coccyx (3, 4 or 5 fused)

Friday 11 March 2016

PALPATION TECHNIQUES AND TRIGGER POINTS OF SOME IMPORTANT MUSCLES

Palpation of the Muscles of the Shoulder Girdle
Trapezius

Starting Position:
• Client prone with arm resting on the table at the side of the body
• Therapist standing to the side of the client
• Palpating hand placed just lateral to the lower thoracic spine (on the 
lower trapezius)
Palpation Steps:
1. Ask the client to abduct the arm at the shoulder joint to 90 degrees 
with the elbow joint extended, and to slightly retract the scapula at 
the scapulocostal joint by pinching the shoulder blade toward the 
spine (Figure A). Adding gentle resistance to the client’s arm abduc-
tion with your support hand might be helpful.
2. Palpate the lower trapezius. To locate the lateral border, palpate per-
pendicular to it (Figure A). Once located, palpate the entirety of the 
lower trapezius.
3. Repeat for the middle trapezius between the scapula and the spine. 
Strum perpendicular to the direction of the fi bers (i.e., strum verti-
cally) (Figure B).
4. Repeat for the upper trapezius.
5. To further engage the upper trapezius, ask the client to do slight ex-
tension of the head and neck at the spinal joints. Then palpate the 
entirety of the upper trapezius (Figure C).
6. Once the trapezius has been located, have the client relax it and pal-
pate to assess its baseline tone.
Palpation Note:
1. Abducting the arm at the shoulder joint requires an upward rotation 
force by the upper and lower trapezius to stabilize the scapula. Re-
tracting the scapula engages the entire trapezius, especially the mid-
dle trapezius.

Rhomboids 

Starting Position:
• Client prone with the hand resting in the small of the back
• Therapist standing to the side of the client
• Palpating hand placed between the spinal column and the scapula at 
the midscapular level
Palpation Steps:
1. Ask the client to lift the hand away from the small of the back 
(Figure A).
2. Look for the lower border of the rhomboids to become visible (Figure B); 
make sure you are not covering the lower border with your palpating 
hand).
3. Palpate the rhomboids from the inferior aspect to the superior aspect. 
When palpating, strum perpendicular to the direction of the fi bers.
4. Once the rhomboids have been located, have the client relax them and 
palpate to assess their baseline tone.
Palpation Notes:
1. Having the client place the hand in the small of the back requires ex-
tension and adduction of the arm at the shoulder joint. This requires 
the coupled action of downward rotation of the scapula at the scapu-
locostal joint, which will cause the trapezius to relax (due to recipro-
cal inhibition) so that we can palpate through it. It will also engage 
the rhomboids so that their contraction will be clearly felt.
2. The superior border of the rhomboids is more diffi cult to visualize and 
palpate than the inferior border. However, it can usually be palpated. 
Feel for a gap between the rhomboids and the levator scapulae.
3. It is usually not possible to clearly distinguish the border between the 
rhomboid major and rhomboid minor.


Coracobrachialis

Starting Position:
• Client seated with the arm abducted to 90 degrees and laterally ro-
tated at the shoulder joint, and the forearm fl exed at the elbow joint 
approximately 90 degrees
• Therapist seated or standing in front of the client
• Palpating hand placed on the medial aspect of the proximal half of 
the client’s arm
• Support hand placed on the distal end of the client’s arm, just proxi-
mal to the elbow joint
Palpation Steps:
1. Resist the client from horizontal fl exion of the arm at the shoulder 
joint and feel for the contraction of the coracobrachialis.
2. Strumming perpendicular to the fi bers, palpate from attachment to 
attachment.
3. Once the coracobrachialis has been located, have the client relax it 
and palpate to assess its baseline tone.
Palpation Notes:
1. To easily discern the coracobrachialis from the short head of the 
biceps brachii, it is important for the forearm to be passively fl exed 
90 degrees or more so that the biceps brachii stays relaxed.
2. If there is doubt as to whether you are on the coracobrachialis or the 
short head of the biceps brachii, resist the client from performing 
fl exion of the forearm at the elbow joint. This will cause the short head 
of the biceps brachii to contract, but not the coracobrachialis. Where 
these two muscles overlap, the coracobrachialis is deep (posterior) to 
the short head of the biceps brachii.
3. Palpation of the coracobrachialis must be done prudently because of 
the presence of the brachial artery and the median, ulnar, and mus-
culocutaneous nerves.


Quadratus Lumborum (QL)

Starting Position:
• Client prone
• Therapist standing to the side of the client
• Palpating hand placed just lateral to the lateral border of the erector 
spinae in the lumbar region
• Support hand sometimes placed directly on the palpation hand for 
support (not shown)
Palpation Steps:
1. First locate the lateral border of the erector spinae musculature (to do 
so, ask the client to raise the head and upper trunk from the table); 
then place palpating fi nger just lateral to the lateral border of the 
erector spinae.
2. Direct palpating pressure medially, deep to the erector spinae muscu-
lature, and feel for the quadratus lumborum (QL).
3. To engage the QL to be certain that you are on it: ask the client to ele-
vate the pelvis on that side at the lumbosacral joint (Note: This in-
volves moving the pelvis along the plane of the table toward the head; 
in other words, the pelvis should not lift up in the air, away from the 
table.) and feel for its contraction (Figure A).
4. Once located, palpate medially and superiorly toward the twelfth rib, 
medially and inferiorly toward the iliac crest, and directly medially to-
ward the transverse processes of the lumbar spine (Figure B).
5. Once the QL has been located, have the client relax it and palpate to 
assess its baseline tone.
Palpation Notes:
1. To successfully palpate the QL, you must be lateral to the erector spi-
nae and then press in fi rmly with a medial direction to your pressure.
2. Whenever pressing deeply to palpate a muscle, always press in fi rmly, 
but slowly.

External and Internal Abdominal Obliques

Starting Position:
• Client supine with a small roll under the knees
• Therapist standing to the side of the client
• Palpating hand placed on the anterolateral abdominal wall
Palpation Steps:
1. With palpating hand on the anterolateral abdominal wall between the 
iliac crest and the lower ribs (be sure that you are lateral to the rectus 
abdominis), ask the client to rotate the trunk to the opposite side of 
the body (contralateral rotation) and feel for the contraction of the ex-
ternal abdominal oblique (Figure A).
2. Try to feel for the diagonal orientation of the external abdominal 
oblique fi bers by strumming perpendicular to them.
3. Continue palpating the external abdominal oblique toward its supe-
rior and inferior attachments.
4. Repeat the same procedure for the internal abdominal oblique, asking 
the client to instead fl ex and ipsilaterally rotate the trunk at the spinal 
joints (Figure B).
5. Once the external abdominal and internal abdominal obliques have 
been located, have the client relax them and palpate to assess their 
baseline tone.
Palpation Notes:
1. When asking the client to contralaterally rotate (to isolate the external 
abdominal oblique) and ipsilaterally rotate (to isolate the internal ab-
dominal oblique), try to have the client do as little fl exion as possible, 
or both abdominal obliques will contract.
2. The fi ber direction of the external abdominal oblique is similar to the 
orientation of a coat pocket.
3. Feeling the fi ber direction of each of the abdominal obliques and dis-
tinguishing between the external and internal abdominal obliques on 
one side can be challenging.

PIRIFORMIS

Starting Position:
• Client prone with the leg fl exed to 90 degrees at the knee joint
• Therapist standing to the side of the client
• Palpating hand placed just lateral to the sacrum, halfway between 
the posterior superior iliac spine (PSIS) and the apex of the sacrum
• Support hand placed on the medial surface of the distal leg, just 
proximal to the ankle joint
Palpation Steps:
1. Begin by fi nding the point on the lateral sacrum that is halfway be-
tween the PSIS and the apex of the sacrum. Drop just off the sacrum 
laterally at this point and you will be on the piriformis.
2. Resist the client from laterally rotating the thigh at the hip joint and 
feel for the contraction of the piriformis. Note: Lateral rotation of the 
client’s thigh involves the client’s foot moving medially toward the 
midline (and opposite side) of the body.
3. Continue palpating the piriformis laterally toward the superior border 
of the greater trochanter of the femur by strumming perpendicular to 
the fi bers as the client alternately contracts (against resistance) and 
relaxes the piriformis.
4. Once the piriformis has been located, have the client relax it and pal-
pate to assess its baseline tone.
Palpation Notes:
1. It can be challenging to discern the borders between the piriformis 
and the gluteus medius superiorly and superior gemellus inferiorly.
2. When giving resistance to the client’s lateral rotation of the thigh at 
the hip joint, do not let the client contract too forcefully, or the more 
superfi cial gluteus maximus (also a lateral rotator) may be engaged, 
blocking palpation of the deeper piriformis.

Tibialis Anterior

Starting Position:
• Client supine
• Therapist standing to the side of the client
• Palpating hand not yet placed on the client
• Support hand placed on the medial side of the distal foot
Palpation Steps:
1. Resist the client from dorsifl exing and inverting the foot and look for 
the distal tendon of the tibialis anterior on the medial side of the foot; 
it is usually visible (Figure A).
2. Palpate the distal tendon by strumming perpendicularly across it. 
Continue palpating the tibialis anterior proximally to the lateral tibial 
condyle by strumming perpendicular to the fi bers. Its belly is located 
directly lateral to the border of the tibia in the anterior leg (Figure B).
3. Once the tibialis anterior has been located, have the client relax it and 
palpate to assess its baseline tone.
Palpation Notes:
1. As with all superfi cial muscles, it is always best to look before placing 
your palpating hand over the muscle; otherwise your hand may block 
you seeing and locating the muscle or its tendon.
2. The distal tendon of the tibialis anterior is usually very prominent and 
visible. The belly is also usually prominent and visible directly lateral 
to the shaft of the tibia in the anterior leg. If the tendon and belly are 
not visible, they can usually be easily palpated by strumming 
perpendicularly.
3. To clearly discern the border between the tibialis anterior and the ad-
jacent extensor digitorum longus (EDL), use inversion and eversion. 
Inversion will engage the tibialis anterior but not the EDL; eversion 
will engage the EDL but not the tibialis anterior.

TRIGGER POINTS


Sternocleidomastoid (SCM)
Anterolateral views illustrating common sternocleidomastoid (SCM) TrPs 
and their corresponding referral zones. A, Sternal head. B, Clavicular 
head.


Scalene

Anterior view illustrating common scalene TrPs and their correspond-
ing referral zone. B, Posterior view showing the remainder of the referral 
zone

Piriformis


Posterior view of common piriformis TrPs and their corresponding referral 
zones.


Hamstring Group

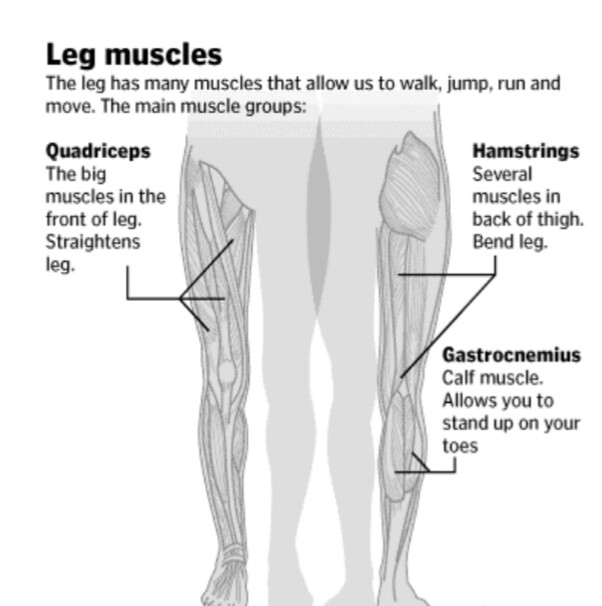
Posterior views of common lateral and medial hamstring TrPs and their 
corresponding referral zones. A, Lateral hamstring (biceps femoris). 
B, Medial hamstrings (semitendinosus and semimembranosus).